Collect Road Data Using the LDC
Roadsoft and the Laptop Data Collector (LDC) are developed to work together for the collection, storage, and use of agency roadway data. To collect accurate data locations, the use of a GPS is required with the LDC. See System Requirements for the basic GPS requirements. For help connecting a GPS to the LDC, see Connect a GPS. Contact technical support at roadsoft@mtu.edu for GPS device recommendations.
When you open the LDC for the first time after installation, there will be no data. Your network for data collection will need to be imported from Roadsoft before collection can begin.
To import data to the LDC, refer to LDC – Import and Export – The Data Cycle.
Import a Network into the LDC
After successfully exporting your network data from Roadsoft, you can begin import of that data to the LDC.
Insert the portable storage device that contains the export file.
Start the LDC. You will be prompted to select a database (DB) and Crew name.
Select the  button to locate the export file on the portable storage device.
If you want to change your database while inside the LDC, select the File menu, then select Change DB (Import Data from Roadsoft).
Collect Ratings
While collecting data, back up every hour, or as often as conveniently possible. From the main LDC menu select the File menu, then Backup Database to back up your data. If data collection spans multiple days, export the data every day and save a copy of the data file (LDCtoRS_ [date]_[time].ldc2rs) to a CD or jump drive.
To enter data into the LDC using shortcut keys, select the Shortcut Keys tab for a list of choices.
To verify that there are no unrated roads in your network, select the File menu. Select Current DB Statistics and verify that the Total Miles Not Yet Rated field displays 0.
In the File menu, select Check for Unrated Segments to open the Unrated Segments form. Highlight a row in the grid to select the segment on the map. Enter a rating for the segment and select Save Rating. Then, move to the next row in the grid. Continue entering ratings for each segment until reaching the bottom of the grid. Select Refresh to update the form. When there are no more records in the grid, all segments have been rated.
Export Collected Data from the LDC and Import to Roadsoft
From the LDC main menu, select the File menu, then Export DB/Data to Roadsoft.
In the Export Path field, enter a location on your hard drive to save the export file. Select the  button to browse your hard drive.
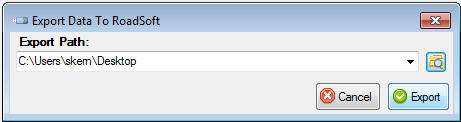
Select the OK button once the Export Complete notice displays.
Copy the "LDCtoRS_ [date]_[time].ldc2rs" file to a portable storage device.
Next, connect the portable storage device to the computer where you have Roadsoft installed. Open Roadsoft.
In Roadsoft, select File, select Import, then select Import LDC Data (LDCtoRS*.ldc2rs) and locate the file on the portable storage device.
Select Import LDC Data. A warning will appear asking “Do you wish to do a backup prior to importing?” Select Yes.
Select Create Backup. Once your backup is successfully created, LDC export and import to Roadsoft will automatically begin.
The "LDCtoRS_[jurisdiction]_[date]_[time]. ldc2rs" file contains a great deal of information that could be useful for emergency data recovery purposes. Users should save a copy of the file in a permanent archive every day to facilitate data recovery.