Roadsoft LDC Trimble R2 GPS Receiver Setup
The Trimble R2 GPS receiver is a common tool used by agencies to gather highly accurate survey data in the field. In addition to providing extremely accurate data, it also provides the ability to establish and maintain communication with more satellites than most internal or consumer-grade USB GPS receivers. For agencies that are already using the Trimble R2 for survey activities, or for those agencies that need a receiver that is able to maintain communication with satellites in varying terrain and/or tree cover, it is possible to set up the Trimble R2 receiver to work with the Laptop Data Collector (LDC).
Configure Trimble R2 via the web interface
Note that agencies looking to use the Trimble R2 with the LDC must check the settings of the R2 receiver any time it has been used with Trimble software such as Terrasync or Pathfinder. The settings are available by connecting to the Trimble R2 via wifi and using a web interface to change the settings. If the LDC fails to connect with the receiver, these settings are the first thing that should be checked.
Connect via wifi
Make sure the receiver is on and in close proximity to your PC.
Connect to the receiver via WiFi – it should be listed as Trimble GNSS XXXX, where XXXX is the last 4 digits of the receiver’s serial number.
Once connected to the GNSS receiver, open a web browser and enter http://192.168.142.1
If you are prompted for login credentials, the default username is ‘admin’ and the default password is ‘password’
If you are unable to connect or don’t know the username or password, the Trimble R2 can be reset to factory settings by holding the power button down for 30 seconds until the light on the front flashes, then release the power button.
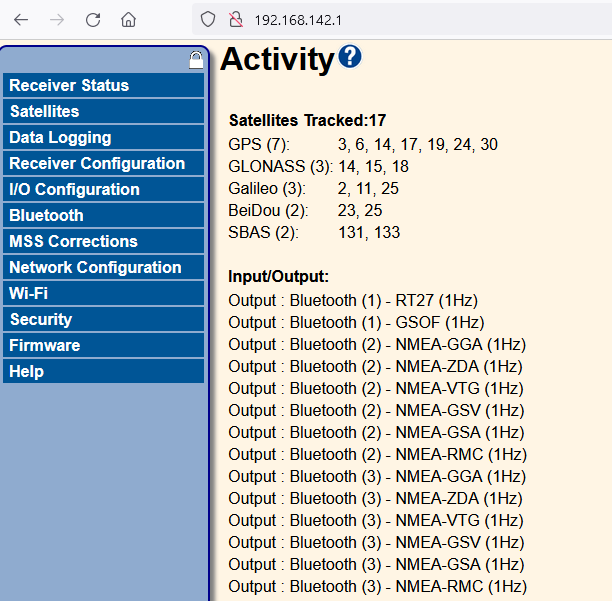
Once connected, the receiver web interface is displayed and the receiver is ready for real-time configuration.
Change Bluetooth Port Settings
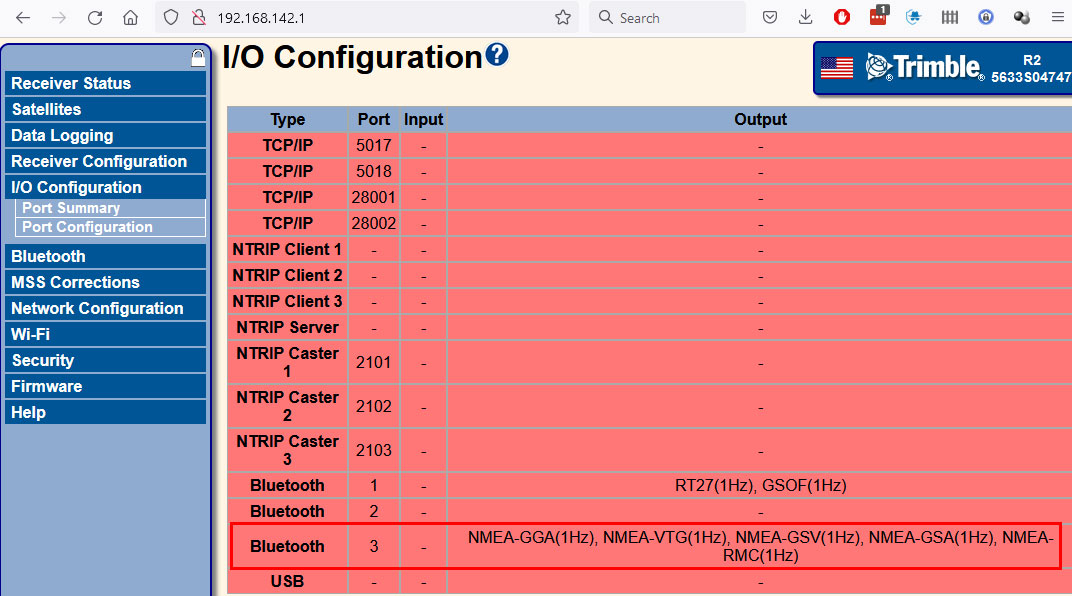
Click on I/O Configuration in the left-pane menu.
By default, Trimble applications will connect to the Trimble R2 via the Bluetooth Port 1 connection, so modify either Bluetooth Port 2 or 3.
Click on either Bluetooth Port 2 or 3.
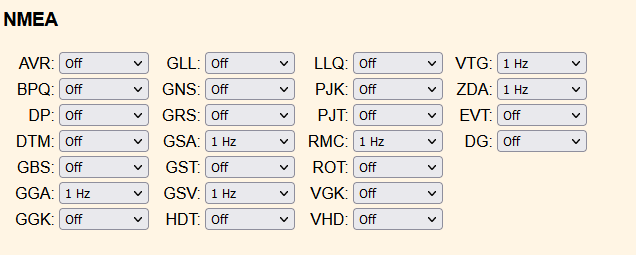
In the I/O Configuration window, select NMEA from the top-right pull-down menu.

Select the Maintain Configuration when connection dropped option.
In the NMEA settings, set GGA, GSA, GSV, RMC, VTG, and ZDA to 1 Hz.
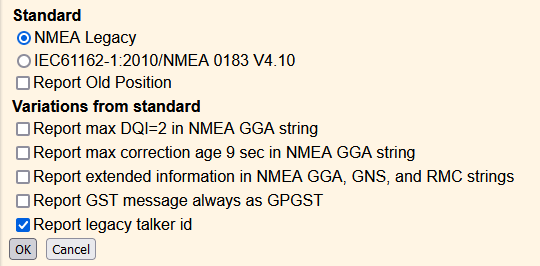
Select the NMEA Legacy option, as well as the Report legacy talker id, and click the OK button
Connect LDC to Trimble R2 via Bluetooth
Once the Trimble R2 has been configured via wifi, connect via Bluetooth to use it with the LDC.
Turn on the Trimble R2.
Open Windows Settings.
Select Devices.
Turn on Bluetooth if not already turned on
Click the “Add Bluetooth or other device” button.
Click Bluetooth on the Add a Device pop-up window.
Select R2, #########: Trimble from the list that appears.
The ######### will vary based on the Trimble R2 model and serial number.
Select the Done button once connected.
There are two options verify the COM ports that have been assigned to the Trimble R2:
Option 1
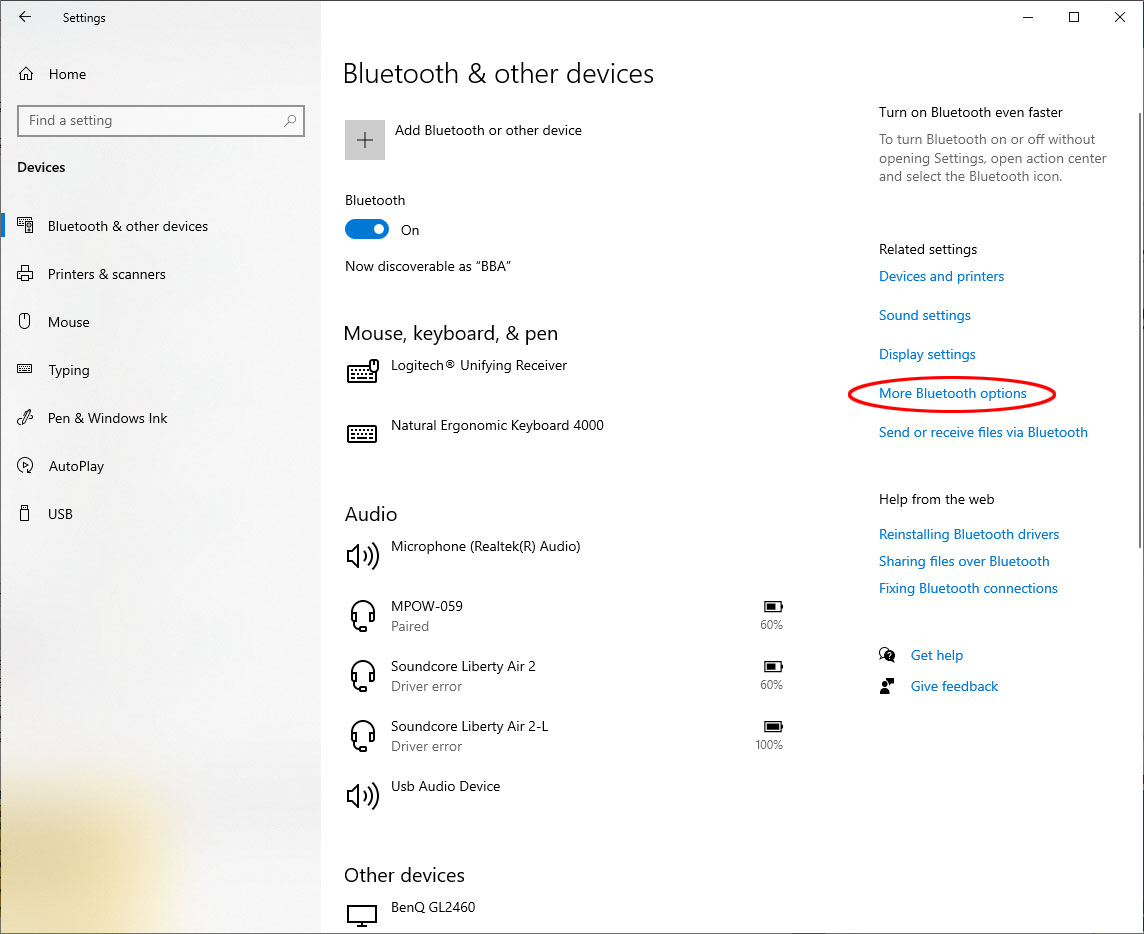
Select the More Bluetooth options from the menu in the Bluetooth & other devices window.
Option 2
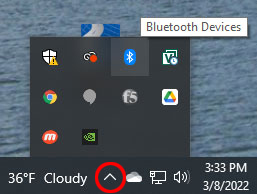
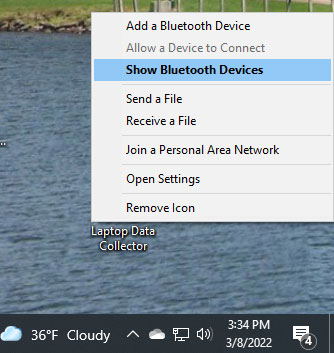
Click on the Show Hidden Icons button on the Windows Task Bar, then select the Bluetooth icon, then select Show Bluetooth Devices option on the pop-up window.
Select the More Bluetooth options from the menu in the Bluetooth & other devices window.
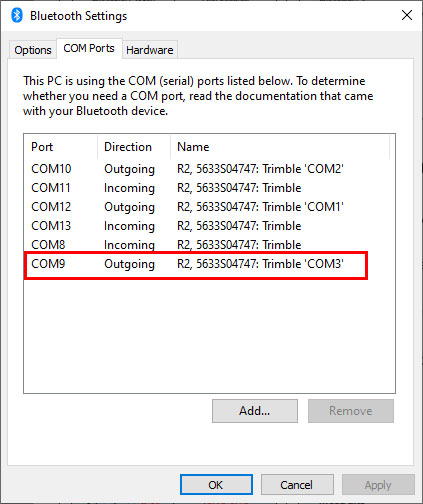
Select the COM Ports tab on the Bluetooth Settings window. Take note of the COM Port that Windows has assigned to the Outgoing R2, #########: Trimble ‘COM#’ which was previously configured.
Within Roadsoft LDC, select the GPS Settings under the GPS pull-down menu.
In the GPS Configuration window that appears, select the COM port assigned to the Trimble R2 noted earlier.
Click the Test Settings button. If this is the first time the GPS has run, it may take a minute to locate itself, but the form fields at the bottom of the window should begin to fill in as the GPS gets a location lock.
At the conclusion of the test, if a signal was received, a confirmation window will appear asking to use the settings and connect, click Yes.
Once connected, your location will be indicated on the map.