Collect Culvert Data Using the LDC
This tutorial uses the Laptop Data Collector. You may wish to have the LDC open while working through these instructions.
When you open the LDC for the first time after installation, there will be no data. Your network for data collection will need to be imported from Roadsoft before collection can begin.
To import data to the LDC, refer to LDC – Import and Export – The Data Cycle.
Import a Network into the LDC
After successfully exporting your network data from Roadsoft, you can begin import of that data to the LDC.
Insert the portable storage device that contains the export file.
Start the LDC. You will be prompted to select a database (DB) and Crew name.
Select the  button to locate the export file on the portable storage device.
If you want to change your database while inside the LDC, select the File menu, then select Change DB (Import Data from Roadsoft).
Connect the GPS
Start the LDC.
Make sure your GPS is off, then connect it to your laptop.
If your GPS is on before connecting it, your mouse pointer may jump around erratically. If this happens, turn off your GPS, leave it connected, and restart Windows and the LDC.
Turn on your GPS and wait for it to acquire a position (this could take a couple of minutes).
From the LDC main menu open the GPS menu and select Start/Stop GPS Connection to establish communication between the GPS and the LDC. Wait a few minutes for the software to snap to the GPS position on the GIS map. If your GPS fails to connect, wait several minutes and try to connect again, or contact Roadsoft support at roadsoft@mtu.edu.
If you’re not on/near a road segment that is part of the network that you imported into the LDC, the LDC will not snap to a segment on the map. Drive your vehicle toward a road that is part of the network so that the vehicle marker can snap to it. If this does not happen, restart the LDC or contact roadsoft@mtu.edu.
Collect Data
While collecting data, back up every hour, or as often as conveniently possible. From the main LDC menu select the File menu, then Backup Database to back up your data. If data collection spans multiple days, export the data every day and save a copy of the data file (LDCtoRS_ [date]_[time].ldc2rs) to a CD or jump drive.
Use the following shortcut keys to enter data into the LDC:
Ctrl + Enter Submit (save) Data
Ctrl + A Add New Culvert
For a complete list of shortcut keys, select the Shortcut Keys tab.
Because there are keyboard shortcuts defined within the LDC, typical keyboard shortcuts such as Ctrl + C (copy) and Ctrl + V (paste) will not work.
The History tab provides a history of PASER ratings for the current segment. Since viewing past PASER ratings can influence the current rating, this grid will not be visible until you submit a rating for the segment.
Export Collected Data from the LDC and Import to Roadsoft
From the LDC main menu, select the File menu, then Export DB/Data to Roadsoft.
In the Export Path field, enter a location on your hard drive to save the export file. Select the  button to browse your hard drive.
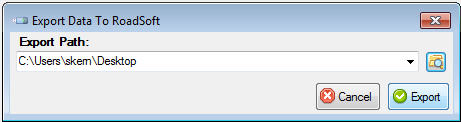
Select the OK button once the Export Complete notice displays.
Copy the “LDCtoRS_ [date]_[time].ldc2rs” file to a portable storage device.
Next, connect the portable storage device to the computer where you have Roadsoft installed. Open Roadsoft.
In Roadsoft, select File, select Import, then select Import LDC Data (LDCtoRS*.ldc2rs) and locate the file on the portable storage device.
Select Import LDC Data. A warning will appear asking “Do you wish to do a backup prior to importing?” Select Yes.
Select Create Backup. Once your backup is successfully created, LDC export and import to Roadsoft will automatically begin.
The “LDCtoRS_[jurisdiction]_[date]_[time]. ldc2rs” file contains a great deal of information that could be useful for emergency data recovery purposes. Users should save a copy of the file in a permanent archive every day to facilitate data recovery.